Area Tool
The Area Tool
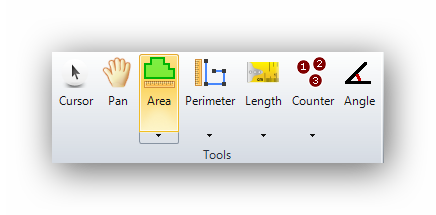
The Area Tool measures the area of a polygonal shape on the canvas. Measure with the mouse by clicking with the left button on all the points (usually the corners) on the perimeter of the area. To release the point entry and end the measurement, click the right button (usually on the last point before the origin point of the area). The Area Tool generates results in square units (square feet, square meters etc.)
Create a New Area
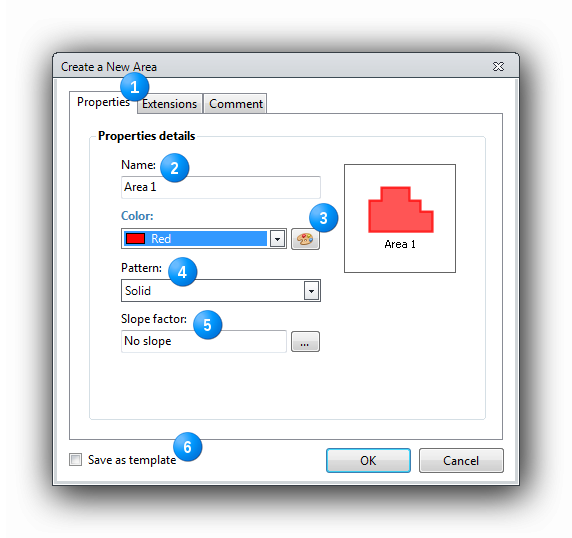
When the Area Tool is selected, a "Create a New Area" window appears to let the user configure the settings of the object or group of objects. In this window, the Name, Color, Fill Pattern and Slope factor can be set for this object. A "Save as template" checkbox can be checked to save this Area configuration for future use on another page of the plan or on new projects. Click the "OK" button to confirm the settings and start measuring on the canvas.
|
|
The Tabs. When creating a New Area, the window will open on the "Properties" tab. An "Extensions" tab displays the available extensions which will add extra results to the raw measurement taken. A "Comment" tab adds comments to the object or group of objects. These comments can be displayed in the report. The extensions and comments can be added later if they are not configured here. |

|
|
The Name of the Area object is modifiable to the user's specifications. |

|
|
The object color Select the object's color with the dropdown menu of by clicking on the "Palette" button. |

|
|
The fill Pattern Choose from 50+ fill patterns for the Area Tool. A light pattern saves lots of printer ink compared to a solid color when printing. |

|
|
The Slope factor Apply a Slope factor if needed. For more information about slope factors with the Area Tool, click here. |
|
|
Save as template Saves an object as a template for future use on another page of the plan or on new projects. To save a template, check the checkbox before clicking the "OK" button. |


Measuring with the Area Tool
The pointer for the Area Tool looks like this : ![]()
In the example images, locate the left clicks : and right clicks :
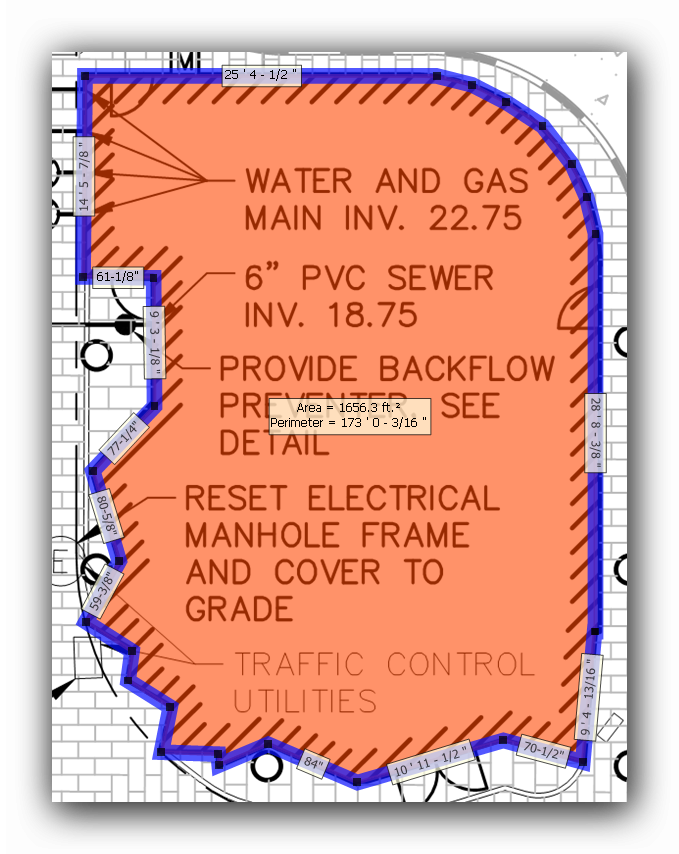
Method # 1 : Click on the perimeter points
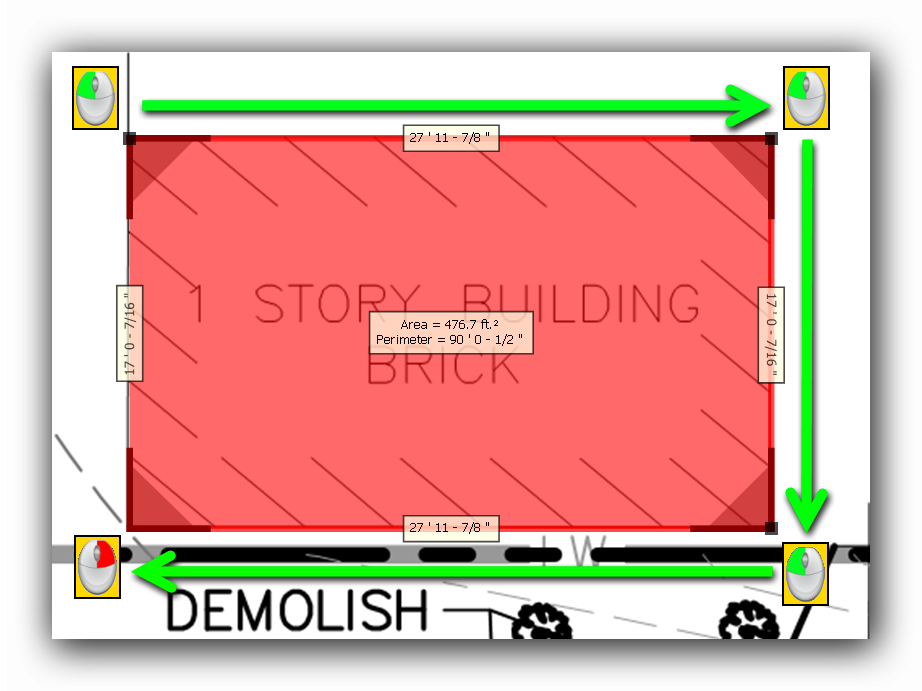
To measure an Area, locate the perimeter of the Area to be measured. Click with the left mouse button on a point (usually a corner) on the perimeter of the Area. Click on the next point in a clockwise or counter clockwise movement with the left mouse button and so on until the entire Area is covered and colored by the tool. To release the tool and stop producing points, click the right mouse button. This right click must be done on the last point of the Area (just before the point of origin). It is useless to go back to the original point since the toll will close the shape to the first point. Each corner of the shape will be represented by a black square (anchor point). The anchor points can be moved to adjust the shape to the exact area to be measured on the canvas. The segments found between the anchor points can also be manipulated. Once the area is completed, the Area Tool will remain active to draw another shape. An area must contain at least three (3) corners or anchor points. While drawing an Area, the fill pattern will only appear after the second point click. The initial segment will appear after the first click. Use the Ortho mode to draw perfectly vertical, horizontal or 45-degree increment lines.
Hint :
Use (Ctrl + Shift + Right-click) on the last point of a perimeter to close the area to the original perimeter point and perform an automatic adjustment of the shape.
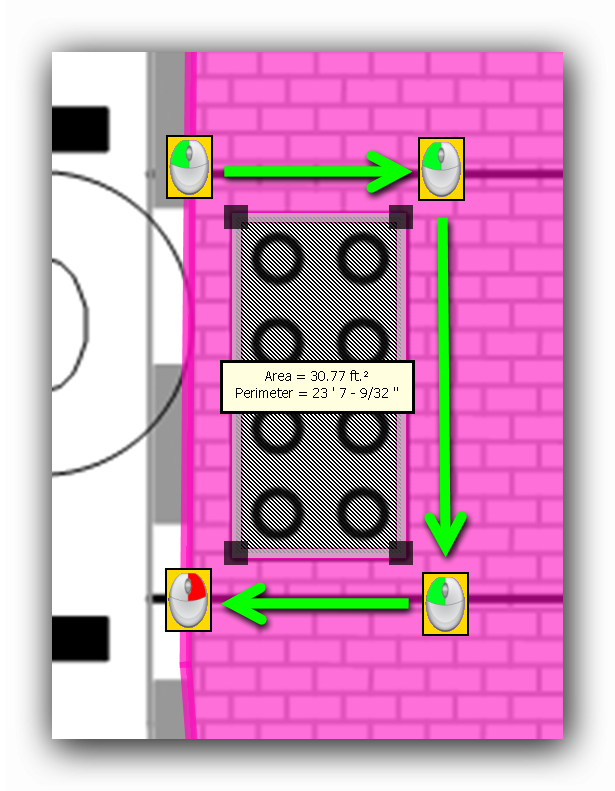
Method # 2 : Stretch a rectangular area from a corner to the opposite corner
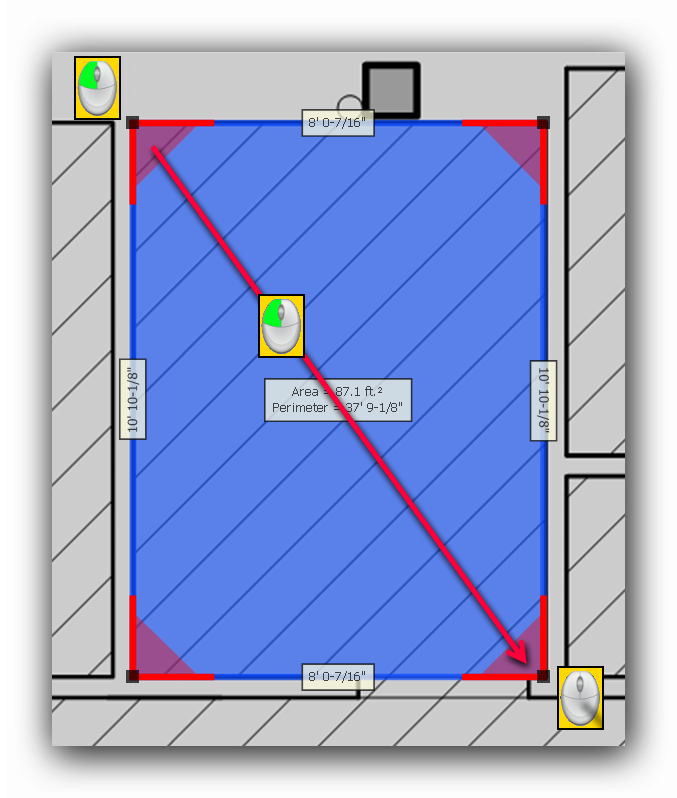
This method is preferred if the area to be measured is square or rectangular. To measure a square or rectangular area, click and hold the left mouse button down and stretch the shape to the opposite corner of the perimeter. Once the cursor is positioned on the opposite corner, release the left mouse button to complete the shape.
The Area Tool's contextual menu
To access the contextual menu of the Area tool, click on one handle anchor, the perimeter of the area or the area itself with the right button of the mouse. The menu will appear and display its many options.
The contextual menu will differ whether the user clicks on the Area itself, on its perimeter or on an anchor point.
Insert a Point
This function insert an extra point on the perimeter of the active Area. This new point can then be moved to modify the shape of the area.
There are two (2) ways to apply Insert a Point when the focus is set on an Area while selecting the perimeter of the Area :
- By using the contextual menu
- By using the keyboard (I)
Delete this Point
This function deletes an point (anchor handle) on the Area perimeter. The Area will reshape itself to the two (2) adjacent points on each side of the deleted point.
There are two (2) ways to apply Delete this Point when the focus is set on an Area while selecting the perimeter of the Area :
- By using the contextual menu
- By using the keyboard (X)
Automatic Adjustment
The Automatic Adjustment of an Area works on area objects that have at least four (4) corners. The effect of the adjustment will operate on the segments that are near of the vertical or the horizontal by detecting these lines on the canvas and matching the area lines to these plan lines.
There are three (3) ways to apply Automatic Adjustment when the focus is set on an Area :
- By using the contextual menu
- By using the keyboard (A)
- While holding down the "Ctrl" button when the Area is completed with a right click.
Add new area to group
Adds a new area object to same group of the original area.
There are two (2) ways to apply Add new area to group when the focus is set on an Area :
- By using the contextual menu
- By using the keyboard (N)
Create a New Subtraction
In an Area, it is frequent that there are sub-areas to be excluded. For example : a wall area without its doors and windows. The subtractions are drawn inside an existing Area. The subtraction inserting method is the same as the original Area. The Properties panel will display the original Area measurement, the subtraction area measurement, the total Area minus the subtraction area, the external perimeter and the combined perimeters of the original Area plus the subtractions. The subtractions are also subjected to the Automatic Adjustment.
There are two (2) ways to apply Create a New Subtraction when the focus is set on an Area :
- By using the contextual menu
- By using the keyboard (S)
Edit Subtractions
When one or many subtractions are found in an Area, they become editable to modify their size, position, shape or to delete them.
There are two (2) ways to apply Edit Subtractions when the focus is set on an Area :
- By using the contextual menu
- By using the keyboard (E)
The subtraction will appear in a hatched pattern. The subtraction must be selected with the mouse before being editable. The subtraction which gets the focus will display its anchor handles. A right click on the mouse opens the subtraction's contextual menu. In this menu, we find the following items :
- Automatic Adjustment
- Delete (the subtraction) (Del)
- Zoom the Object (Z)
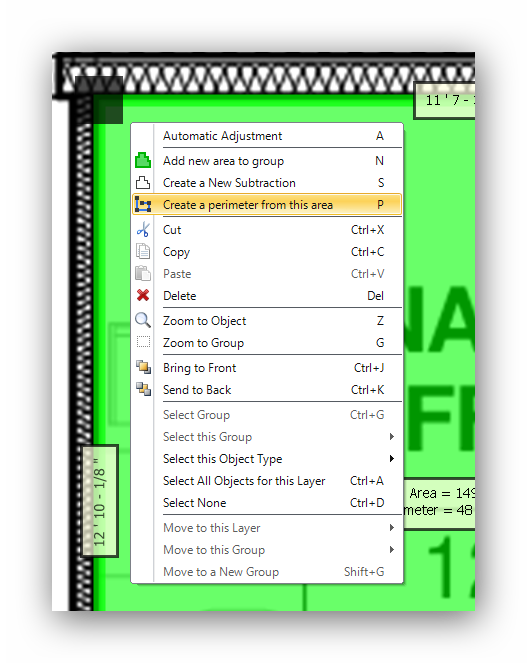
Create a perimeter from this area
This function creates a new perimeter group from the external perimeter of the current area. The new perimeter can then be associated to an existing group by using the "Move to this group" item from the new perimeter's contextual menu.
There are two (2) ways to apply Create a perimeter from this area when the focus is set on an Area :
- By using the contextual menu
- By using the keyboard (P)
For other functions of the contextual menu, click on the following topics :
Select Functions in Contextual Menus
Move Functions in Contextual Menus
Accurate move and positioning
When the focus is set on an Area, it can be accurately compressed or enlarged by using the Shift + (+) and Shift + (-) keys.
To accurately move and position an Area, use the arrows on the keyboard while holding the Ctrl button down. Many Areas can be moved simultaneously.
Pan the canvas while measuring.
The canvas can be panned while measuring with the Area tool. Hold the right mouse button down and move the canvas. When the right mouse button is released, the canvas is repositioned and the measuring process continues.
See also :