The Plans Tab
The Plans Tab
The Plans tab is the second tab in the ribbon. Here we find the Insert Plans and Selected Plans functions.
|
|
The ribbon. The ribbon contains the PDF or Image format plan inserting functions, image resolution adjustment function and plan properties editing functions. |

|
|
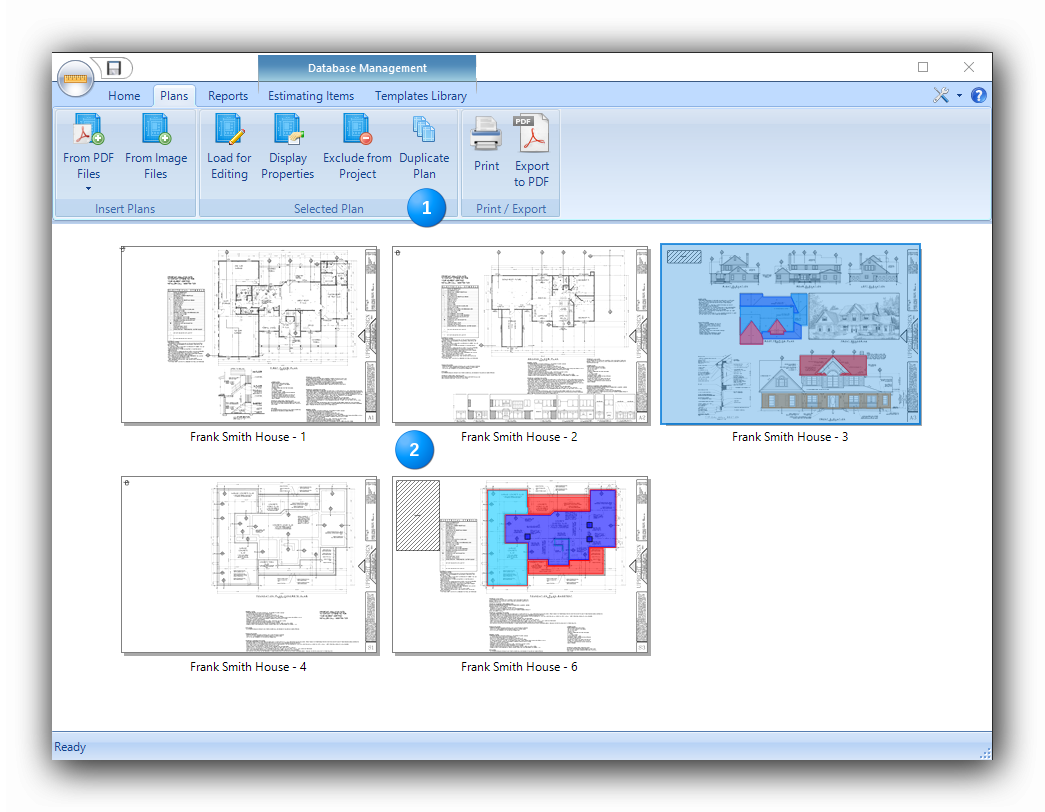
The plan viewer displays an overview of all the plans previously loaded in the project. The viewer in the Plans tab shows a complete overview of all plans inserted in a project. Each plan can be selected with the mouse to access and edit its properties. It can also be excluded from the project or double-clicked to be loaded for measurement in the Home tab. If all inserted plans do not show in the viewer, use the vertical scroll bar to browse through the list of plans. |


The ribbon of the Plans tab
|
|
The "Insert Plans" functions The "From PDF Files" buttons will directly insert plans in the project by opening single or multi-page PDF files. Many files can be opened in the same operation. Click on the black arrow under the button to calibrate the image resolution factor before the import. There are three (3) resolution levels shown in DPI (Dots Per Inch) :
Active Takeoff is set by default at 172 DPI, a setting which provides an optimal balance between speed, precision and image clarity. The "From Image Files" button inserts pixel image format files such as : .bmp, .png, .tif, .tiff, .jpg, .jpeg. The images files inserted in these format keep their native resolution. Scales must generally be set manually with these formats with a known measurement on the plan. |
|
|
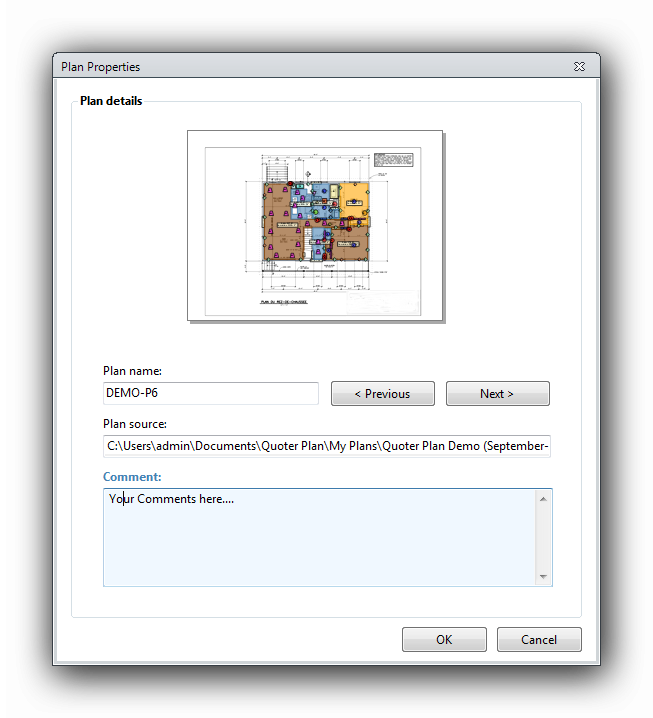
The "Selected Plan" functions The "Load for Editing" button directly loads the selected plan in the viewer in the "Home" tab for immediate use. The plan thumbnail can also be double-clicked to load the plan. The "Display Properties" button displays and allows the modification of the plan name, to add or to modify comments associated with the plan and to navigate through the plans with the "Previous" and "Next" buttons.
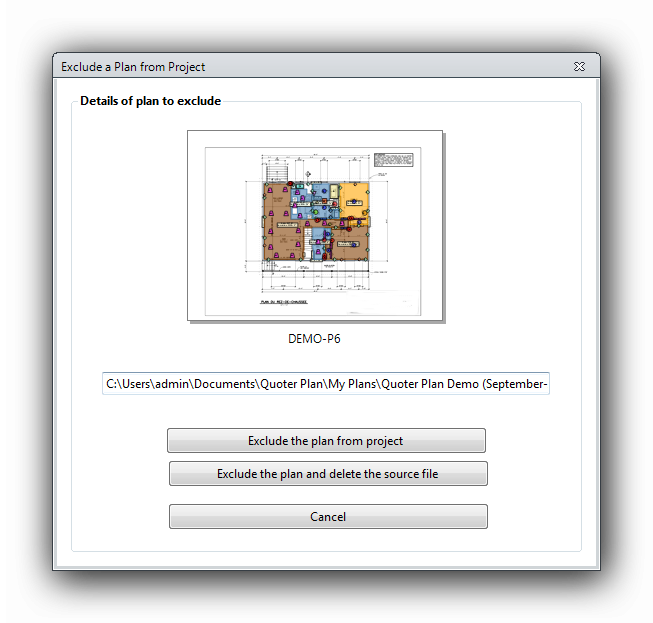
The "Exclude from project" button removes a plan from the project. The second button removes the plan from the project and deletes the source file. Deleting the source file will not delete the original PDF or image file.
The "Duplicate Plan" button clones an existing plan from the project.
The Duplicate Plan function allows the user to select the number of copies required by sliding the needle left or right and to select the option to copy the plan objects from the source plan to the duplicated plan(s). When the options are selected, the "Duplicate" button will perform the required action in the "Plans" tab. This example shows the result of the plan "Frank Smith House - 6" duplicated three (3) times with the existing objects.
Duplicating a plan will also duplicate the layers that are present on the source plan. The "Report", the "Groups" and "Properties" panels and the legends will react accordingly. |
|
|
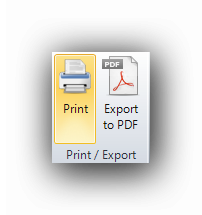
The "Print / Export" functions
The "Print" button prints one or many plans. The "Export to PDF" exports one or many plans in one or many PDF files. |


See also :
Inserting One or Many PDF plans
Inserting One or Many Image Format Plans
Print one or many plans from the Plans tab
Export one or many plans in PDF format from the Plans tab